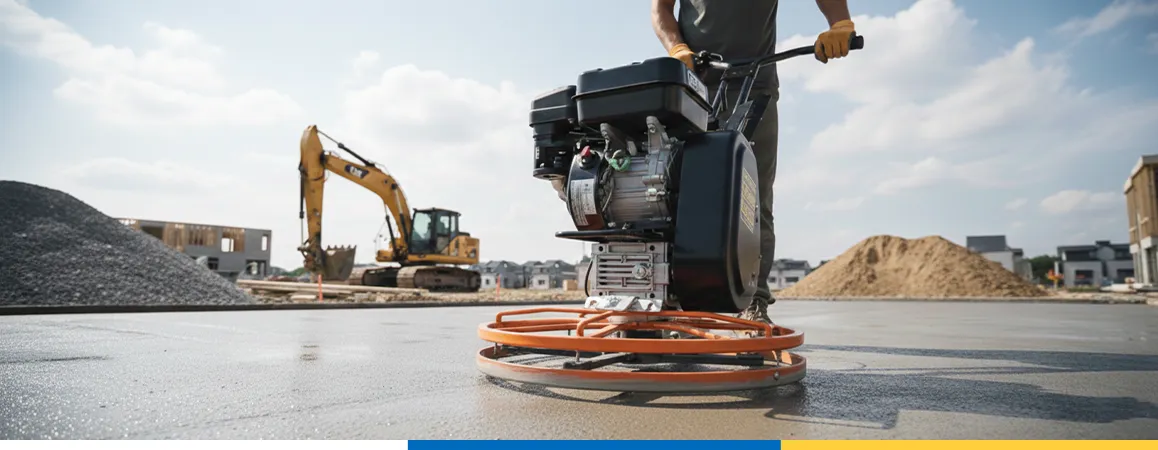
The power float, also known as a power trowel, is a crucial piece of equipment in the construction industry, particularly for concrete finishing. This machine is designed to provide a smooth, polished finish to concrete slabs, enhancing both the appearance and durability of the surface. By using a rotating set of blades, the power float can cover large areas more efficiently than manual methods, reducing labor costs and time while ensuring a consistent finish.
The importance of a power float lies in its ability to deliver a superior surface finish. Unlike traditional hand troweling, which can be inconsistent and time-consuming, the power float ensures that the concrete is evenly compacted and smoothed. This results in a more durable surface that is resistant to wear and tear, making it ideal for high-traffic areas such as warehouses, factories, and commercial spaces. Additionally, a well-finished concrete surface is easier to clean and maintain, adding to its long-term value.
Moreover, mastering the use of a power float can significantly enhance the quality of your work and elevate your reputation in the industry. By understanding the intricacies of this tool, you can achieve a level of craftsmanship that sets you apart from the competition. Whether you're a seasoned professional or a novice, investing time in learning how to effectively use a power float will pay dividends in the quality of your projects and the satisfaction of your clients.
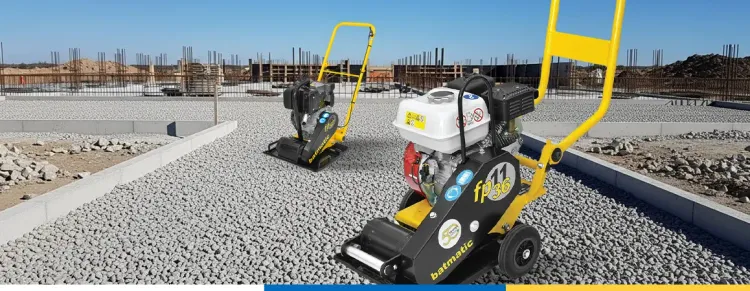
Before diving into the techniques of power floating, it's important to have the right tools at your disposal. The primary piece of equipment is, of course, the power float itself. There are two main types of power floats: walk-behind and ride-on. Walk-behind power floats are ideal for smaller projects or areas with limited access, while ride-on power floats are better suited for large-scale jobs where efficiency is paramount.
In addition to the power float, you'll need a set of high-quality blades. There are different types of blades designed for various stages of the finishing process. Float blades are used for the initial pass to compact and level the concrete, while finish blades are used for subsequent passes to achieve a smooth, polished surface. It's essential to choose the right blades for your specific project to ensure the best results.
Other essential tools include a concrete edger, which helps create clean edges along the perimeter of the slab, and a concrete groover, which is used to create control joints. You may also need a hand trowel for touch-ups and areas that are difficult to reach with the power float. Having a reliable set of tools will not only make the power floating process more efficient but also help you achieve a professional-quality finish.
Proper preparation is key to achieving a perfect finish with a power float. Before you begin, ensure that the concrete has been poured and leveled correctly. Any inconsistencies in the surface can affect the performance of the power float and the final result. Use a screed to level the concrete and remove any excess material, ensuring that the surface is as even as possible.
Next, allow the concrete to set to the appropriate consistency. Timing is crucial in power floating, as the concrete needs to be firm enough to support the weight of the machine but still pliable enough to be worked. This stage is often referred to as the "bleed water" phase, where excess water rises to the surface and begins to evaporate. Wait until the bleed water has disappeared and the concrete has reached the right consistency before starting the power floating process.
It's also important to check the weather conditions before you begin. Extreme temperatures, high humidity, or strong winds can affect the curing process and the performance of the power float. If possible, plan your work during mild weather conditions to ensure the best results. Additionally, make sure the surface is free of debris and any obstacles that could interfere with the power float's operation.
Mastering the techniques of power floating is essential for achieving a flawless finish. Begin by using float blades for the initial pass. These blades are designed to compact and level the concrete, creating a smooth base for subsequent passes. Start the power float at a low speed and move it in a systematic, overlapping pattern to ensure even coverage. Pay close attention to the edges and corners, as these areas can be more challenging to finish.
As the concrete begins to harden, switch to finish blades for the final passes. These blades are designed to produce a polished, smooth surface. Increase the speed of the power float and continue to move it in an overlapping pattern, gradually reducing the angle of the blades as the concrete hardens. This technique helps to eliminate any remaining imperfections and achieve a high-quality finish.
It's also important to monitor the condition of the blades throughout the process. Dull or damaged blades can affect the performance of the power float and the quality of the finish. Regularly check the blades for wear and replace them as needed. Additionally, ensure that the power float is properly maintained and in good working condition to avoid any disruptions during the finishing process.
Even experienced professionals can make mistakes when power floating, which can compromise the quality of the finish. One common mistake is starting the power float too early. If the concrete is too wet, the power float can create ruts and uneven surfaces. It's important to wait until the concrete has reached the right consistency before beginning the power floating process.
Another frequent error is applying too much pressure with the power float. Excessive pressure can cause the blades to dig into the concrete, creating gouges and uneven areas. Use a light, steady hand and allow the blades to do the work. Gradually adjust the angle and speed of the blades as the concrete hardens to achieve a smooth finish.
Neglecting the edges and corners is another common mistake. These areas can be more difficult to reach with the power float, but they are just as important as the rest of the surface. Use a hand trowel or concrete edger to touch up these areas and ensure a consistent finish. Taking the time to address these details will result in a more professional and polished final product.
Achieving a smooth finish with a power float requires attention to detail and a methodical approach. Start by ensuring that the concrete is properly prepared and at the right consistency before you begin. Use float blades for the initial pass to level and compact the surface, and switch to finish blades for subsequent passes to achieve a polished finish. Move the power float in a systematic, overlapping pattern to ensure even coverage.
Pay close attention to the edges and corners, as these areas can be more challenging to finish. Use a hand trowel or concrete edger to touch up these areas and create clean lines. Additionally, monitor the condition of the blades throughout the process and replace them as needed to ensure optimal performance.
Another tip for achieving a smooth finish is to be mindful of the weather conditions. Extreme temperatures, high humidity, or strong winds can affect the curing process and the performance of the power float. If possible, plan your work during mild weather conditions to ensure the best results. Taking the time to address these factors will help you achieve a flawless finish and enhance the overall quality of your work.
Timing is a critical factor in the power floating process, as it can greatly impact the quality of the finish. The concrete needs to be firm enough to support the weight of the power float but still pliable enough to be worked. This stage is often referred to as the "bleed water" phase, where excess water rises to the surface and begins to evaporate.
It's important to wait until the bleed water has disappeared and the concrete has reached the right consistency before starting the power floating process. Starting too early can cause the power float to create ruts and uneven surfaces, while starting too late can make it difficult to achieve a smooth finish. Monitor the condition of the concrete closely and use a simple touch test to determine if it's ready for power floating.
Another aspect of timing to consider is the weather conditions. Extreme temperatures, high humidity, or strong winds can affect the curing process and the performance of the power float. If possible, plan your work during mild weather conditions to ensure the best results. Taking the time to monitor these factors and adjust your timing accordingly will help you achieve a flawless finish.
Proper maintenance and care of your power float equipment are essential for ensuring its longevity and optimal performance. Regularly inspect the power float for any signs of wear or damage, and address any issues promptly to avoid disruptions during the finishing process. Pay close attention to the condition of the blades, as dull or damaged blades can affect the quality of the finish.
Cleaning the power float after each use is also important. Concrete residue can build up on the blades and other components, affecting the performance of the machine. Use a wire brush or scraper to remove any concrete buildup, and clean the blades thoroughly with water and a mild detergent. Additionally, lubricate any moving parts to ensure smooth operation.
It's also important to store the power float properly when not in use. Keep it in a dry, protected area to prevent rust and other damage. If possible, cover the machine with a tarp or other protective covering to keep it clean and free of debris. Taking the time to properly maintain and care for your power float equipment will help ensure its longevity and reliable performance.
Even with the best preparation and techniques, issues can arise during the power floating process. One common problem is the presence of air bubbles or voids in the concrete surface. This can be caused by improper mixing or pouring of the concrete, or by starting the power float too early. To address this issue, ensure that the concrete is properly mixed and poured, and wait until it has reached the right consistency before starting the power floating process.
Another common issue is the appearance of ridges or lines in the concrete surface. This can be caused by uneven pressure or improper blade angle during the power floating process. To avoid this, use a light, steady hand and move the power float in a systematic, overlapping pattern. Gradually adjust the angle and speed of the blades as the concrete hardens to achieve a smooth finish.
If you encounter any other issues during the power floating process, take the time to troubleshoot and address them promptly. This may involve adjusting your techniques, replacing worn or damaged blades, or addressing any underlying issues with the concrete itself. By being proactive and attentive, you can overcome these challenges and achieve a flawless finish.
Mastering the power float is an invaluable skill that can significantly enhance the quality of your concrete finishing projects. By understanding the importance of proper preparation, timing, and technique, you can achieve a flawless finish that sets you apart from the competition. Investing in high-quality tools and equipment, and taking the time to properly maintain and care for them, will also contribute to your success.
Remember to be mindful of common mistakes and take the time to troubleshoot and address any issues that arise. Pay close attention to the condition of the concrete and the performance of the power float, and adjust your techniques as needed to achieve the best results. By being proactive and attentive, you can overcome any challenges and achieve a professional-quality finish.
Whether you're a seasoned professional or a novice, mastering the power float will help you achieve a level of quality and precision that will impress your clients and enhance your reputation in the industry. So take the time to improve your skills and achieve a flawless finish with the power float.